
DIY SHED FOR $15
5 Best Diy Desk Ideas For Cheap!
Do you work from home? Are you in need of space to pay bills, grade papers, or to do basic paperwork? Well, if so, then you need a desk.
But they can be so expensive to purchase, and if they aren’t, often the quality is lacking. So why not build your own? That is exactly what my husband did for me.
See, I work from home as a writer, and I also handle paying our bills. Plus, we homeschool so I need a place to plan, organize, and check assignments. That is when he decided to build a very simple desk for me.
And the best part, it cost around $20 to build.
Here is how he did it:
What You’ll Need:
- 1- 1x12x8 piece of wood
- 2- 2x3x8 piece of wood
- 2- 1x4x8 piece of wood
- Nail gun with nails (optional)
- Hammer and nails
- Miter Saw
1. Design the Desk
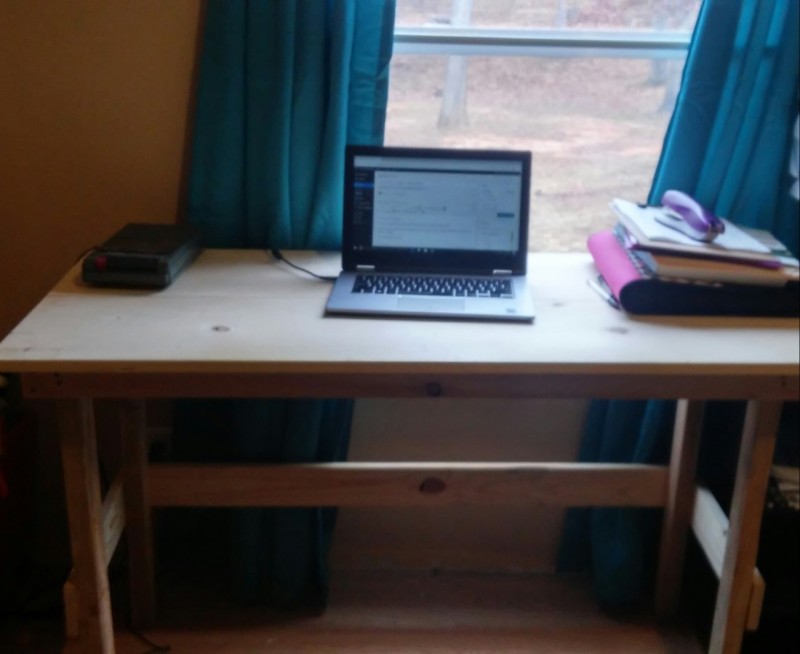
This design is basically a small table. I didn’t want anything with drawers, a roll top, or any other upgrades. The reason is that I like simple items. They are easier to build, cheaper to build, and they also force me to stay organized, or I have to look at the mess.
So even if you don’t like this design for a basic desk, you could also make adjustments to broaden or lengthen it, and create a nice piece of furniture. If it were a little larger, it could work well as a kitchen table, or it could also work well as a buffet piece in the kitchen.
But if you like simple designs like me, then you’ll hopefully love it as a desk. I know I do!
2. Cut the Legs to Height
Which means, we decided to cut the legs to about 29 inches in height. We used the 2×3’s for the legs of this desk.
Once you have your four legs cut to length you are ready to move on to the next step.
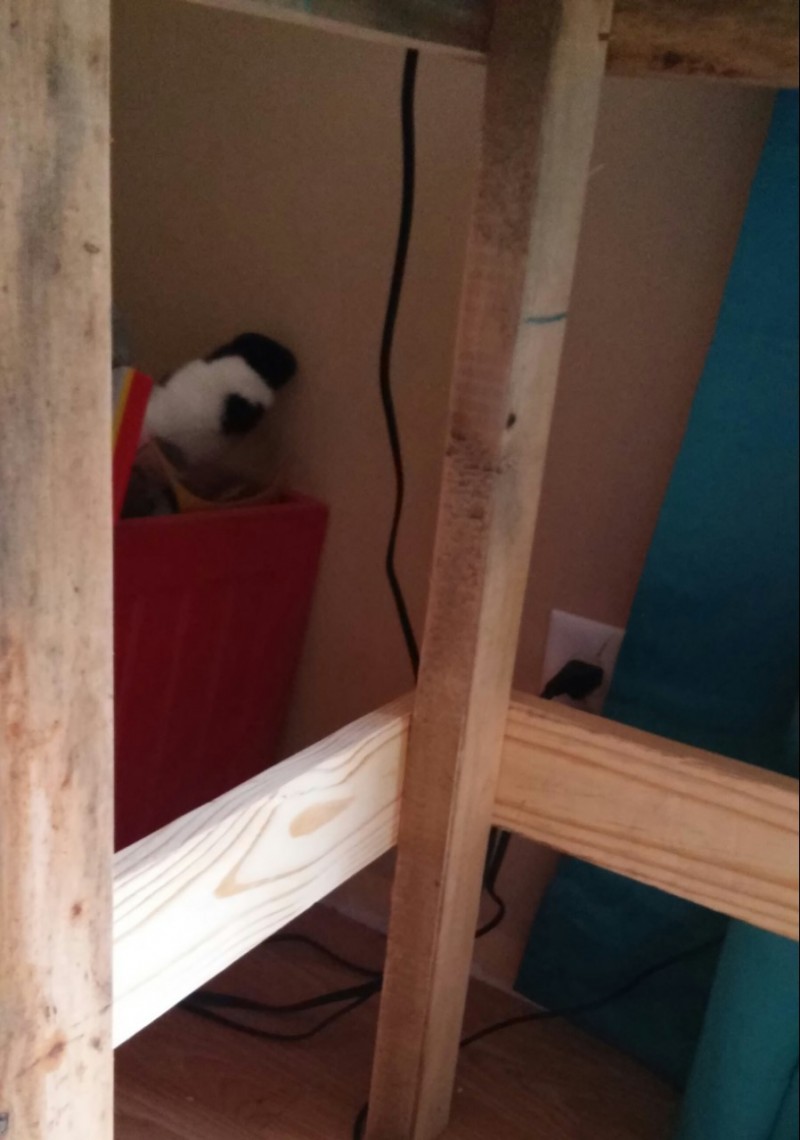
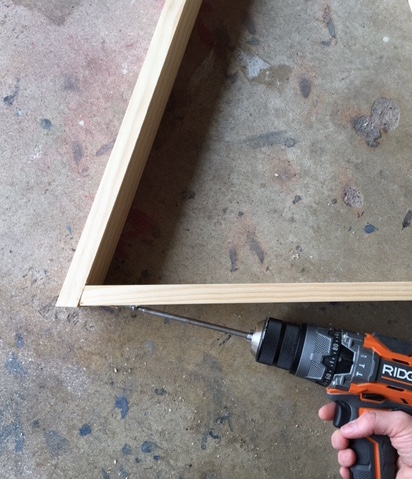
3. Create the Bracing and Skirting
Next, you’ll want to pull out your 1×4’s and put them to work. We’ll start first with the bracing. You’ll cut 1 of the 1×4’s into three separate pieces. You’ll need the two sides to measure 17 inches, and the back brace to measure 43 inches.
Once you get your bracing measured, you’re ready to cut your skirting to length. Again, you’ll pull out your second 1×4, but this time you’ll need four pieces. You may have to use some of what was left over from the wood you cut the bracing out of.
So you’ll need the sides of your skirting to be 17 inches, but you’ll need both a front and back piece for your skirting that each measure at 43
Again, these measurements could vary depending upon the size you plan on making your desk. This is just the measurements we used.
Now that you have all of the pieces cut you are ready to begin assembly. We used a nail gun because my husband uses them regularly, and they do make the job go faster.
However, if you aren’t familiar with a nail gun, then by all means use a hammer and nails. It will work wonderfully for this project.
4. Assemble the Bracing and Skirting
Now that you have all of your pieces cut to length it is time to begin the assembly process. Begin by standing two of the legs up. You might want to enlist the help of someone to hold the pieces in place, or you could try using clamps. It is up to you.
Next, you’ll take one of the 17 inch pieces of the skirting and place it at the top of the legs. Then you’ll stand up a third leg and take one of the 43 inch pieces of the skirting and attach it to the top. You’ll repeat this process all the way around rotating between the 17 inch piece on the short side and the 43 inch piece on the long side.
The idea is to have all four legs standing and connected by this rectangle of skirting. Then you’ll want to repeat the same process around the legs at the midway point to ensure that the desk is stable.
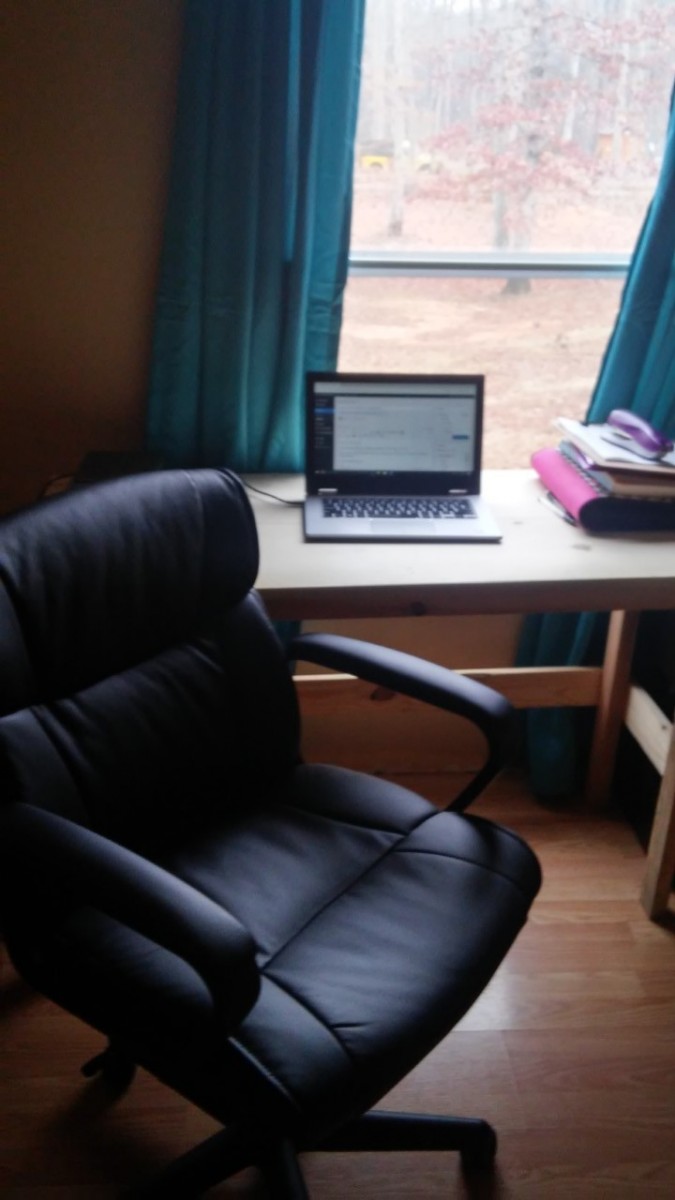
Obviously, you’ll use the longer portion for the backside of the desk, and the shorter portions for the sides of the desk. You won’t have a front portion to the bracing because you wouldn’t be able to slide a chair under the desk otherwise.https://d7e865fd2d5bec269af49371361aa7f8.safeframe.googlesyndication.com/safeframe/1-0-37/html/container.html
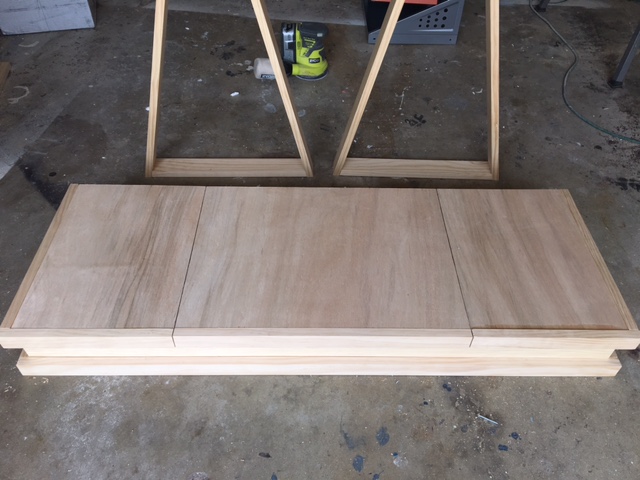
5. Make the Top and Assemble
After you’ve got the bare bones of the desk assembled you are ready to create the top. You’ll utilize the 1×12’s for this step. The top of my desk is about 48 inches in length. This creates a little overhang which I like.
So you’ll cut the 1×12 to the length you desire it to be. Then you’ll have to do it again with the wood you have remaining.
Next, you’ll have the two cut boards which will be the top of your desk. You will either use a nail gun or a hammer and nails to secure them to the frame of the desk. Your desk is now functional. Congratulations!
6. Stain to Fit
I have not completed this step yet because I’ve been so busy. But I do hope over the winter months I’ll make the time to paint or stencil my desk to make it look more like my desk. https://d7e865fd2d5bec269af49371361aa7f8.safeframe.googlesyndication.com/safeframe/1-0-37/html/container.html
However, if you have the time to go ahead and stain it, stencil it, or paint it I would recommend getting it out of the way. The reason is that because my wood is still unprotected I have to use coasters at my desk or I’ll end up with wood rings.
So go ahead and put a protective coating over the wood so your desk will look like new for a long time to come. Then get busy enjoying your new space as you work away on daily tasks or on your job.
7. Our Price
So I told you that we were able to build this desk for around $20. I’m not affiliated with the business where we purchased our materials, and their prices may change.
But these are our prices:
- The 1x12x8 was purchased for $13.
- The 2- 2x3x8 boards were purchased for $2.18 a piece.
- The 2- 1x4x8 boards were purchased for $1.98 each. They are also referred to as furring strips.
All of these items were purchased at Lowe’s Home Improvement Store. So you can easily check what their prices would be in your area.
Also, as mentioned, we did use a nail gun, but we already had that from doing numerous other projects in the past. Obviously, if you were just going to need something to put this desk together, a hammer and nails would be much more economical. We also had the miter saw from other projects as well. There are more economical ways to cut wood besides using a miter saw as well, if you only need it for this
And that, my friends, is how I got a very functional, simple, DIY desk on a very modest budget.
That Brings Our Total To About $17.42 Including Tax !
The Bucket Stool
2/5

So simple, almost anyone can make it, the bucket stool takes only $5 and one hour of your time. Mix up some concrete, pour it into the bottom of a bucket and let it set with wooden dowels for legs.
The Flip Desk
3/5

The Flip Desk is made for multitasking, small space dwellers. If your desk serves double—or triple—duty, the flip desk’s hidden compartments will suit your style. Find out how to make your own here.
DIY LIVE EDGE WOOD DESK
4/5
.jpg)
.jpg) I love the desk that we made for their room so we’re sharing the DIY behind that today! (And yes, for those that are observant, the wall color changed behind the desk.
I love the desk that we made for their room so we’re sharing the DIY behind that today! (And yes, for those that are observant, the wall color changed behind the desk.
It’s not always easy (or cheap!) to obtain large wood slabs, but we came up with a way that might make getting one giant wood slab a little easier. This is actually 2 smaller wood slabs, glued together to form one piece. Smaller pieces tend to be a little cheaper, as well as easier to find. Mike made our coffee table in the living room the same way a few years ago. After planning about a dozen different desk ideas for the boys room and changing my mind 100 times, we finally settled on a wall mounted desk, and still had some live edge pieces to use, so we used a couple of those to make the desk. (Our wood came from a dead tree out back that a friend of a friend was able to cut up for us). Mike also made the shelf supports underneath the desk; originally I ordered a set of black steel supports, but ended up running into issues with the company I had ordered from, so we made our own. I didn’t intend to share those as a DIY, because I thought we’d be using steel ones eventually, so there’s no step photos for that.
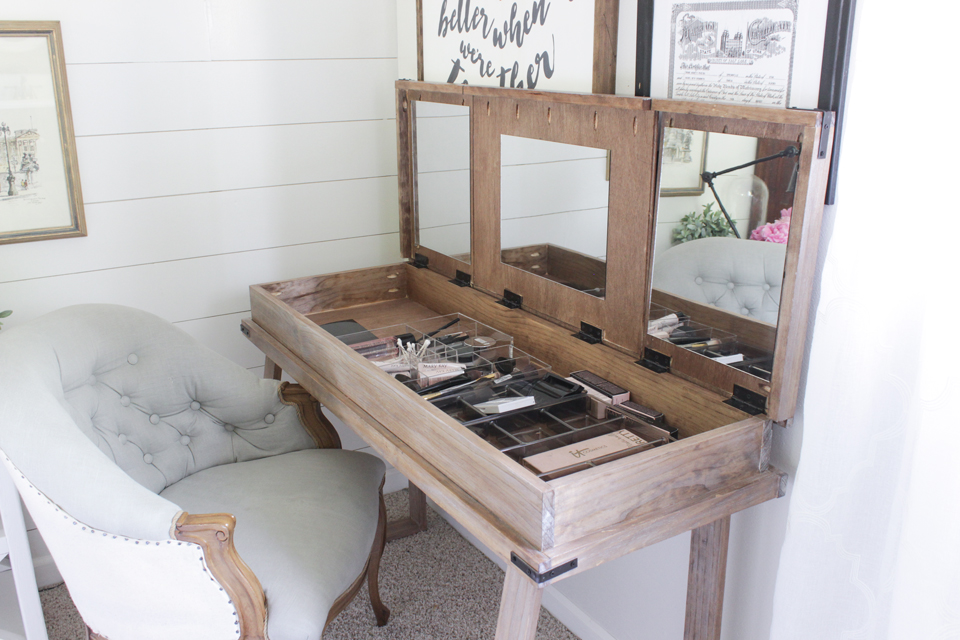
Three Compartment Desk- Step by Step Guide
5/5.jpg)

So friends, here is how I built it…
DOWNLOAD FREE PLANS HERE
Above has the digital, detailed, step by step plans, and I’m going to show you some progress shots I took to give you the basic idea.
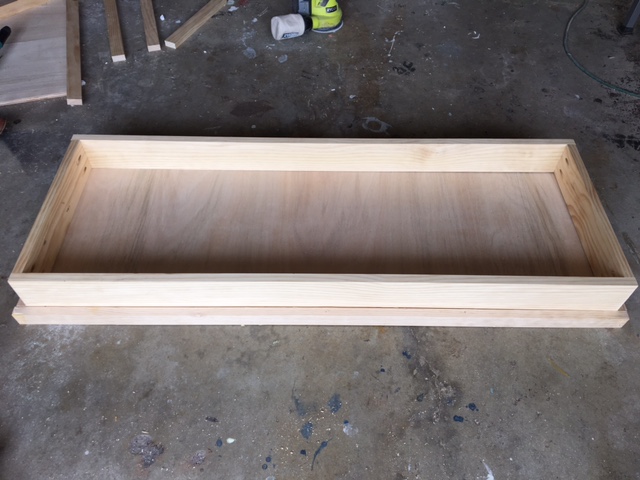
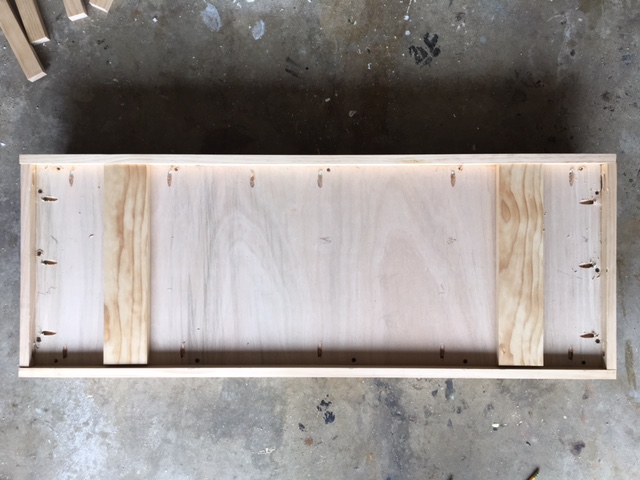
First I built the bottom by attaching a 1/2″ piece of plywood to a frame of 1x2s. I used very thin 1/4 plywood pieces to give it a little space when attaching the plywood so the screws don’t split the wood.
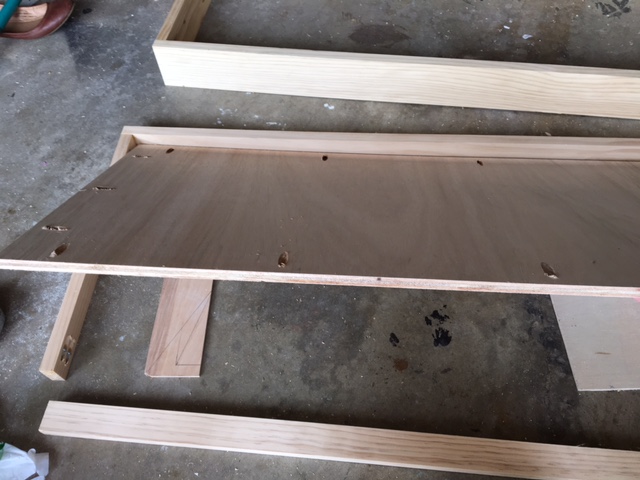
Then I made another frame piece out of 1x4s but one that would fit on the inside of the 1×2 frame on the base.
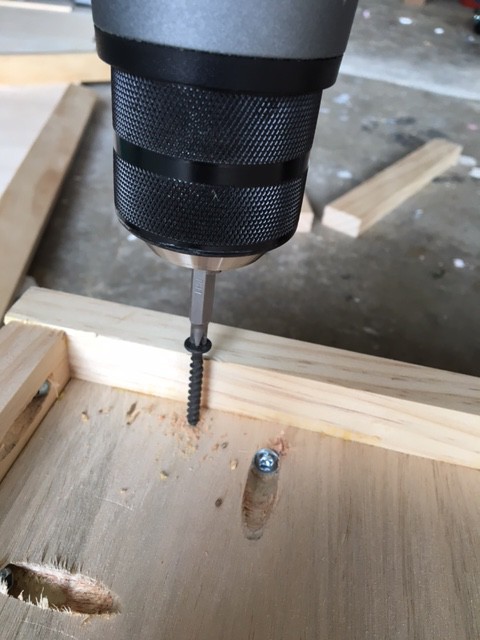
I attached this 1×4 inner frame that is actually the sides of the desk, to the bottom plywood by flipping it over, pre-drilling some holes…
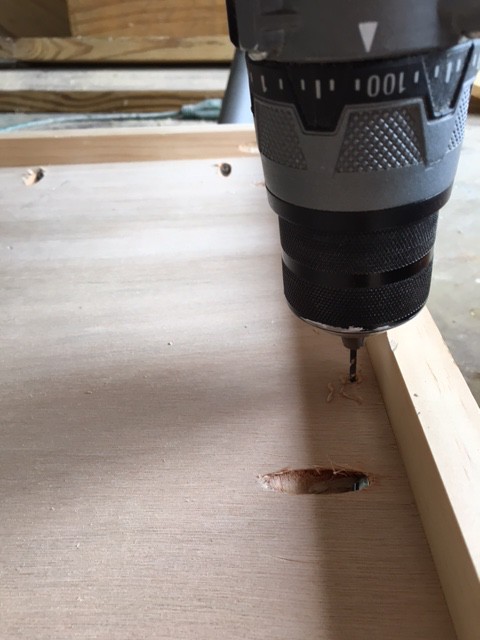
attaching screw from the underside into the 1×4 sides.
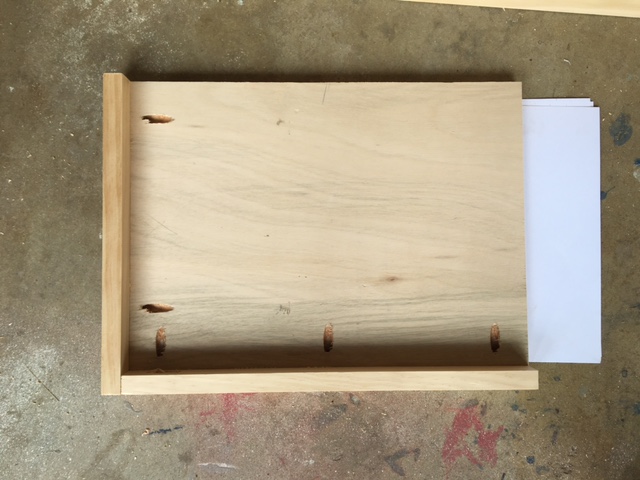
Next up was the 3 part lid. Each piece fits together to make up just a bit bigger than the 1×4 sides –so that there isn’t too much wood rubbing against each other (there’s a joke in there somewhere…). Attach 1×2 frame pieces to the lids as well (but only on 2 sides for the left and right lids and only on the front for the middle lid. And I used a few pieces of cardstock under the plywood so there would be the tiniest bit of lip when I attached it to the 1x2s.
Once all three lids have their 1×2 trims attached, you put them together and make sure they fit!
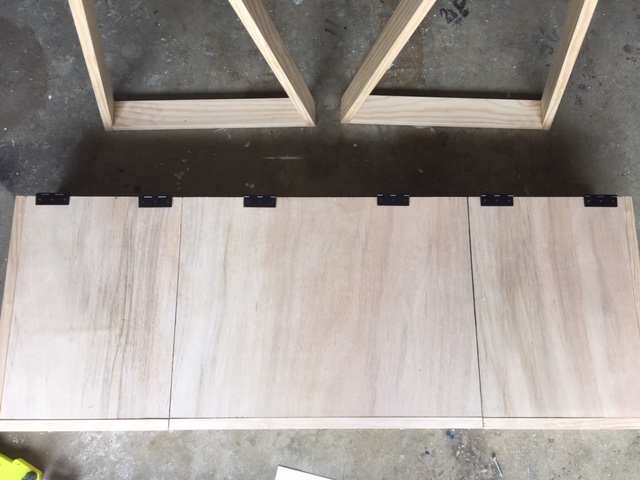
Notice the legs above? They are super easy– just a perpendicular joint on one side and a 10 degree off center angled joint on the other. Use regular pocket holes to join them from the underside of the leg base.
Attach the legs to these two leg supports on the underside of the desk, then attach the leg supports to the desk using regular wood screws!
Since attaching the legs comes last, you will want to measure and attach the lids using flat hinges. Biggest pain in the butt, but so so necessary.
To read about my rustic Eastlake headboard makeover, go HERE.
You might be wondering, why 3 separate lids? Well, when you have a multi-use desk, you don’t want to have to clear everything off when you need something out of it. I can have the lamp, a vase with flowers on one lid, my laptop on the middle lid, and then open the other lid to access my makeup and have a handy mirror to use while I’m at it!
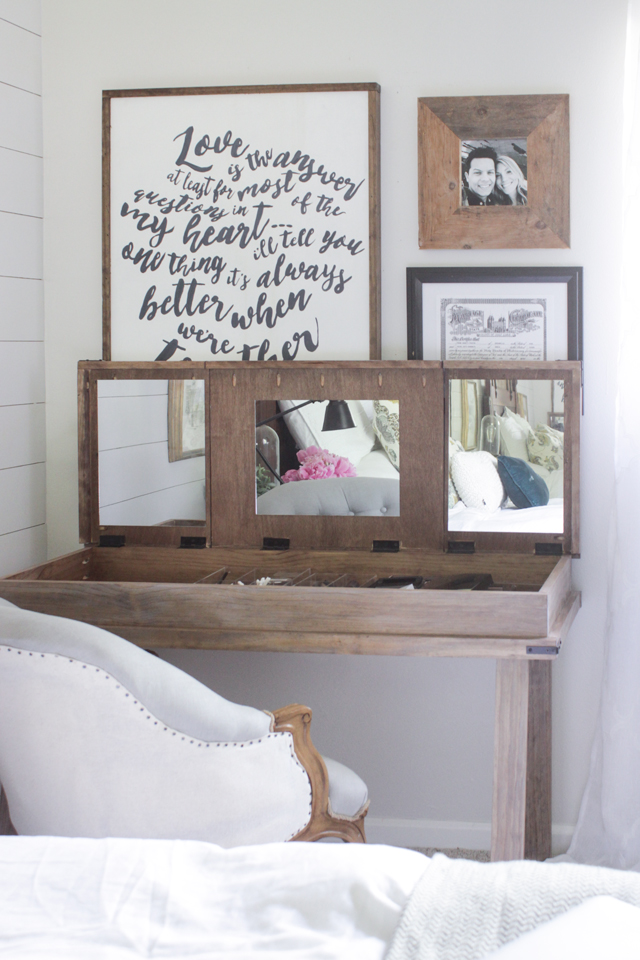
You actually can hold quite a lot– I got these clear organizers from Amazon and they hold all my stuff and room for more! The mirrors I got from the Dollar Store and just took their cheapy-plastic edges and cardboard backs off and glued them to the underside of the lids. Because- hello! You can never have enough mirrors! 😉

One thought on “$15 DIY Shed Ideas”